
Table of Contents
If you’re building a live streaming setup or launching an internet television service, choosing the right IPTV encoder is one of the most consequential decisions in the process. Without a reliable encoding solution, even the best camera hardware and fastest broadband connection will produce disappointing results — buffering, degraded picture quality, and failed streams that frustrate your audience.
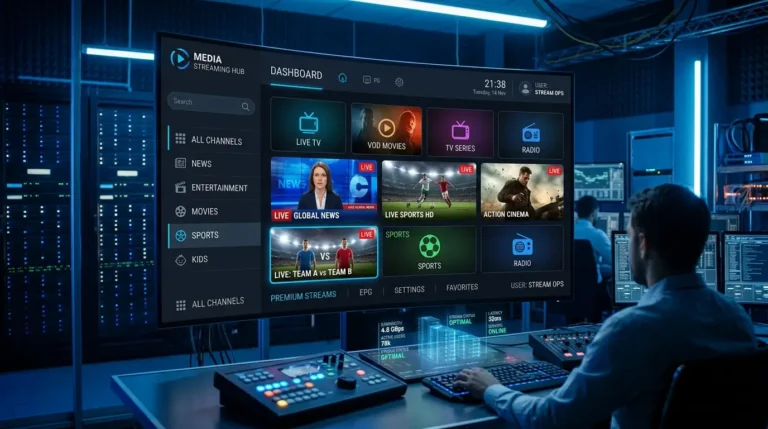
An encoder converts raw video signals into compressed digital formats that can be delivered efficiently over IP networks to viewers on smart TVs, smartphones, laptops, and set-top boxes. Whether you’re running a small community channel, a corporate broadcast network, or a professional headend system, understanding how encoding works will give you a genuine advantage.
This guide covers everything you need — from types and codecs to step-by-step setup and practical performance tips — so you can choose the solution that fits your specific requirements. Users should comply with local broadcasting laws and licensing regulations when distributing content.
What Is an IPTV Encoder and Why Does It Matter
An IPTV encoder is a device or software application that compresses raw video into a format suitable for delivery over internet protocol networks. Raw video captured by cameras or production switchers is enormous in file size — impossible to stream efficiently without first being compressed.
The encoding process reduces file size while preserving as much visual quality as possible, producing a stream that can be delivered reliably to viewers regardless of whether they’re on a local network or watching over the public internet.
The importance of getting this right cannot be overstated. Poor encoding choices lead to:
- Excessive buffering caused by bitrates that exceed available bandwidth
- Degraded image quality from over-compression or incorrect codec settings
- Latency problems that disrupt the live viewing experience
- Compatibility failures with set-top boxes and media players
Modern encoding solutions support a range of output protocols — including RTMP, HLS, SRT, and UDP — making them compatible with a wide variety of distribution platforms. The right choice for your deployment depends on your network conditions, audience size, and content type.
Hardware vs Software: Choosing the Right Type of IPTV Encoder
When exploring your options, you’ll encounter two main categories: hardware encoders and software encoders. Each serves different use cases and comes with distinct trade-offs.
Hardware Encoders
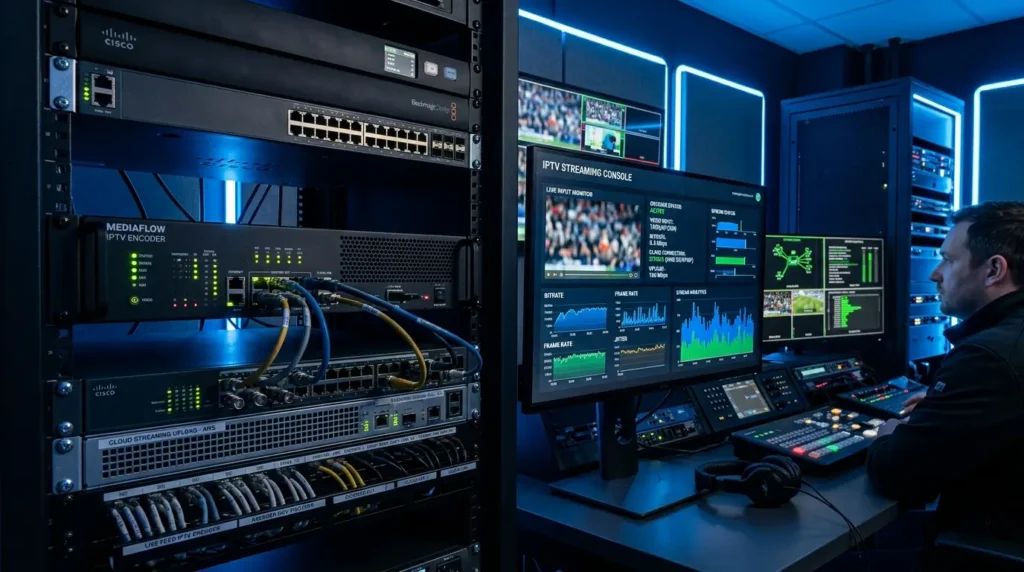
A dedicated hardware IPTV encoder is a physical device built specifically for real-time video encoding. These units accept HDMI, SDI, or composite video inputs and output encoded streams continuously without relying on a general-purpose computer.
Why choose hardware:
- Ultra-low latency processing — ideal for live sports and events
- Stable, predictable performance around the clock
- No competition for CPU resources with other applications
- Plug-and-play simplicity for non-technical operators
- Built for 24/7 broadcast environments without overheating or degradation
Hardware units are the preferred choice for professional broadcasting, hotel television systems, corporate video networks, and large-scale headend deployments.
Software Encoders
A software encoder runs on a standard computer and uses the CPU or GPU to compress video in real time. Popular software solutions offer extensive customization and are widely used by content creators and smaller streaming operations.
Why choose software:
- Lower upfront investment
- Highly configurable settings for advanced users
- Regular feature updates from active development communities
- Easy integration with existing production workflows
The trade-off is dependency on your computer’s performance. Under heavy processing loads, software solutions may introduce latency or drop frames — a risk that dedicated hardware is specifically designed to eliminate.
Key Features to Evaluate Before You Buy
Selecting the right encoding solution requires looking beyond the marketing and evaluating the specifications that actually affect real-world performance.
Codec Support
Your solution should support modern video codecs — at minimum H.264 (AVC) and H.265 (HEVC). H.264 remains the most universally compatible option across all playback devices. H.265 delivers equivalent visual quality at roughly half the bitrate, making it valuable for 4K content and bandwidth-constrained networks. Some advanced systems also support AV1 for next-generation delivery pipelines.
Output Protocol Range
A capable IPTV encoder supports multiple streaming protocols:
- RTMP — the standard for pushing streams to middleware and distribution platforms
- HLS — adaptive bitrate protocol with broad device compatibility
- SRT — low-latency, encrypted protocol ideal for unreliable network conditions
- UDP/RTP — commonly used in local network IPTV distribution and headend systems
Multi-Channel Capability
For enterprise deployments, your solution must handle multiple channels simultaneously without performance degradation. This is a critical specification for hospitality networks, sports venues, and cable headend operations.
Bitrate Control Modes
Flexible bitrate management is essential for balancing quality against bandwidth usage. Look for solutions that offer both CBR (constant bitrate) for predictable network consumption and VBR (variable bitrate) for optimized quality across scenes with varying complexity.
How to Set Up Your IPTV Encoder for Live Streaming
The setup process follows a consistent sequence regardless of whether you’re using a hardware unit or software solution.
Step 1 — Connect Your Video Source Connect your camera, production switcher, or capture card to the encoder’s input. For hardware units, this means an HDMI or SDI cable. Software solutions typically accept input from a capture card connected via USB or PCIe.
Step 2 — Configure Video and Audio Settings Set your resolution (1080p for most deployments, 4K where supported), frame rate (25fps for PAL regions, 30fps for NTSC), and audio bitrate (128–320 kbps depending on quality requirements).
Step 3 — Choose Your Output Protocol Decide whether you’re pushing via RTMP to a middleware server, generating HLS for a web player, or distributing over a local UDP multicast network. Configure your output settings accordingly.
Step 4 — Enter Your Streaming Destination Input the server URL and stream key for RTMP delivery, or the multicast address for local network distribution. Double-check all values — a single character error will prevent the stream from connecting.
Step 5 — Run a Test Before Going Live Always conduct a full test stream before any live event. Monitor for latency, audio synchronization, and visual quality. Most encoding interfaces include a preview mode or real-time monitoring dashboard for exactly this purpose.
Codecs and Protocols Explained
Understanding the technical layer beneath your encoding solution helps you make smarter configuration decisions that directly affect output quality and viewer experience.
H.264 vs H.265
H.264 is the industry standard for most deployments. It offers excellent compatibility across virtually all devices — from older smart TVs to mobile browsers — and is well supported by every major streaming platform. H.265 delivers the same visual quality at roughly half the bitrate, making it the better choice for 4K content and bandwidth-limited networks, provided your target devices support it.
SRT Protocol
Secure Reliable Transport has become the preferred protocol for professional live contributions over unpredictable internet connections. SRT automatically recovers lost packets, provides end-to-end encryption, and delivers significantly lower latency than standard RTMP — making it the go-to protocol for remote production workflows and contribution links.
Adaptive Bitrate Streaming
Many modern solutions output HLS or DASH streams at multiple quality levels simultaneously. Viewers automatically receive the highest quality their connection supports, reducing buffering across diverse device types and network conditions. This is now considered standard practice for any public-facing streaming deployment.

Tips for Getting the Best Encoding Results
Small configuration decisions have a large impact on output quality and stream reliability.
Match Your Bitrate to Your Network Over-specifying your bitrate relative to available upload bandwidth is the single most common cause of stream instability. For 1080p, a bitrate of 4–8 Mbps typically delivers excellent quality. For 4K, plan for 15–25 Mbps depending on codec and scene complexity.
Use a Wired Connection Always connect your encoding workstation or hardware unit to your router via ethernet. Wi-Fi introduces variable latency and packet loss that directly affects stream stability, particularly during scenes with high motion or colour complexity.
Enable Hardware Acceleration Where Available Software solutions can offload encoding work to your GPU using hardware acceleration — reducing CPU load significantly and improving stability under demanding conditions. Enable this feature in your settings if your graphics hardware supports it.
Monitor in Real Time Use your solution’s monitoring tools to watch bitrate, frame rate, and dropped frame counts during live streams. Addressing issues as they emerge is far preferable to discovering problems after the broadcast has ended.
Frequently Asked Questions
What is the difference between a hardware and software IPTV encoder? A hardware solution is a dedicated physical device designed for real-time encoding with consistent, low-latency performance. A software solution runs on a general-purpose computer and offers greater flexibility at lower cost, but depends on available system resources.
Which codec should I use? H.264 is the safest choice for maximum device compatibility. If you’re streaming 4K content or need to reduce bandwidth consumption, H.265 is the better option — provided your playback devices support it.
Can my encoding solution handle multiple channels simultaneously? Many professional systems support multi-channel encoding. Check the specifications of your chosen solution for the exact number of simultaneous streams supported before purchasing.
What internet speed do I need for a stable stream? For 1080p streaming, a stable upload speed of at least 8–10 Mbps is recommended. For 4K, plan for 25–50 Mbps. These figures apply per stream — multiple simultaneous channels multiply the requirement accordingly.
Is SRT better than RTMP for live streaming? SRT offers lower latency and superior packet loss recovery compared to RTMP, making it the better protocol for professional live contributions over public internet connections. RTMP remains widely supported for pushing streams to distribution platforms and middleware systems.
Conclusion: Choose the Right IPTV Encoder for Your Streaming Goals
The encoding solution you choose defines the quality, reliability, and scalability of your internet television service. Whether you opt for a dedicated hardware unit for round-the-clock professional broadcasting or a flexible software solution for smaller creative projects, the right setup makes all the difference.
Focus on the codecs your audience’s devices support, the protocols that suit your network infrastructure, and the stability your streaming environment demands. A well-configured IPTV encoder is the foundation of any successful streaming deployment — invest in it with the same care you’d give any other critical piece of infrastructure.
Ready to upgrade your streaming quality? Evaluate your encoding requirements today and choose the solution that matches your ambitions.